System
This page gives an overview of the structure and mechanisms we use in our system.
Modular Launch System
We created a modular launch system that can be used to launch any combination of the ‘platforms’ we support. We see both sensors and robots as platforms and divide them in the categories arm, vehicle, camera, lidar and gps. Any desired combination of platforms can be launched using:
uv run start.py <configuration_name>
When we directly execute this file without passing a desired configuration, the system won’t start. We can select a predefined configuration using the configuration argument. Running this command creates a compose.yml file with all the necessary configuration settings.
Modular Configuration
Each platform class will be initialized by at least defining the specific platform type. For example, for a camera we support the types realsense or Zed, related to the different camera types we support. Furthermore we can specify the position and the orientation as [roll, pitch, yaw] in degrees. Next, we can choose to pass a desired namespace for the platform. Finally, we can link two platforms as a parent and a child of each other. Some platforms have additional parameters the can be used during initialization. For example: we can define whether we like to use MoveIt or Navigation for an arm or a vehicle respectively.
Nodes Started
All the nodes required for the selected configuration are automatically started by the relevant compose.yml file. For each platform, the following nodes are started:
robot_state_publisher:
publishes URDF to
/robot_descriptionupdates
/tftree based on/joint_states
static_transform_publisher (links with map frame):
Only used for platforms that have no parent (and thus need to be linked to the world)
Adds a link between the platform and the map frame to
/tf_static
static_transform_publisher (links with parent):
Only used for platforms that have a parent
Adds a link between the platform and it’s parent to
/tf_static
With these nodes, a correct tf tree is created for the whole system. The other nodes that are automatically started by the launch file are:
Gazebo (when using simulation)
Hardware interfaces (when using hardware)
Controllers (for the robots)
Joystick nodes
Platform specific nodes (like MoveIt or Nav2)
Visualization tools (like RViz or Vizanti)
Visualization Libraries
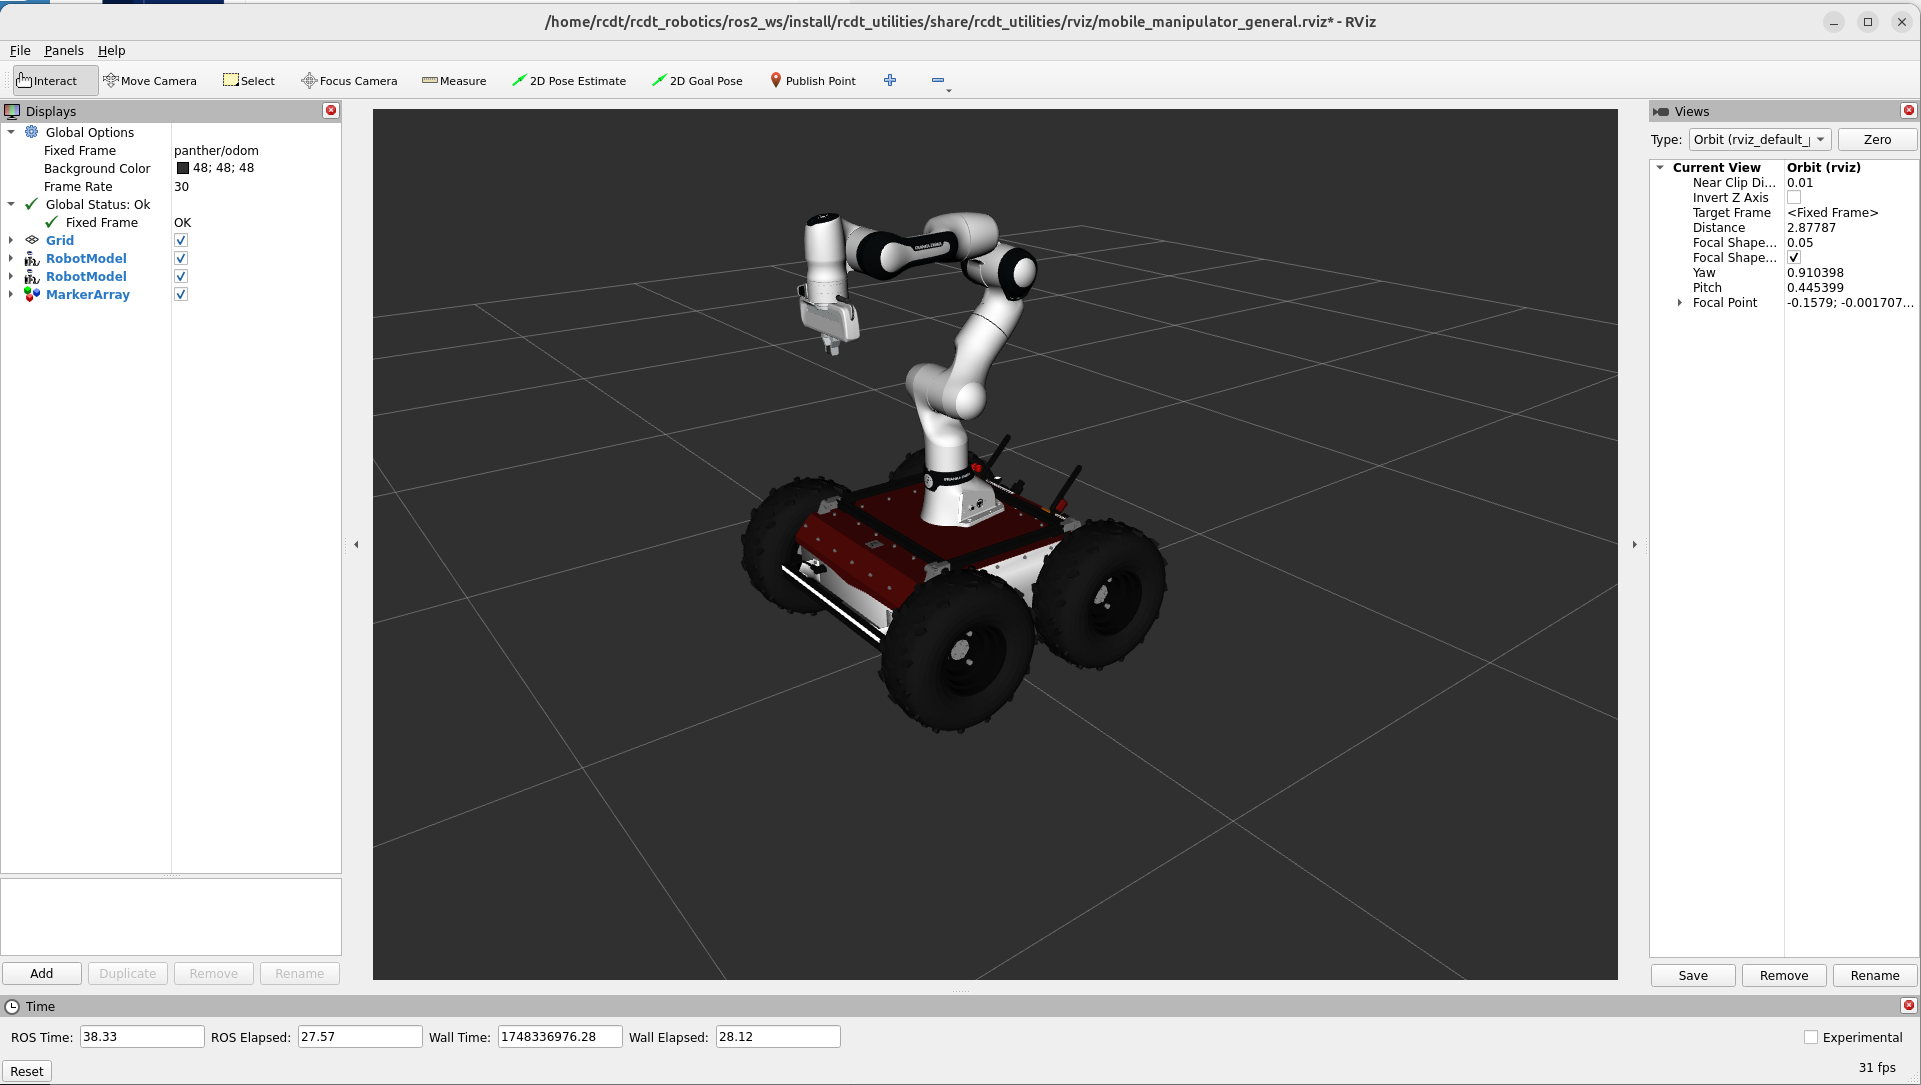
To visualize the state of our platforms, we use RViz and Vizanti. When RViz is used, a window is automatically opened during launch. When using Vizanti, a server is started wherafter the interface can be reached on http://127.0.0.1:5000:
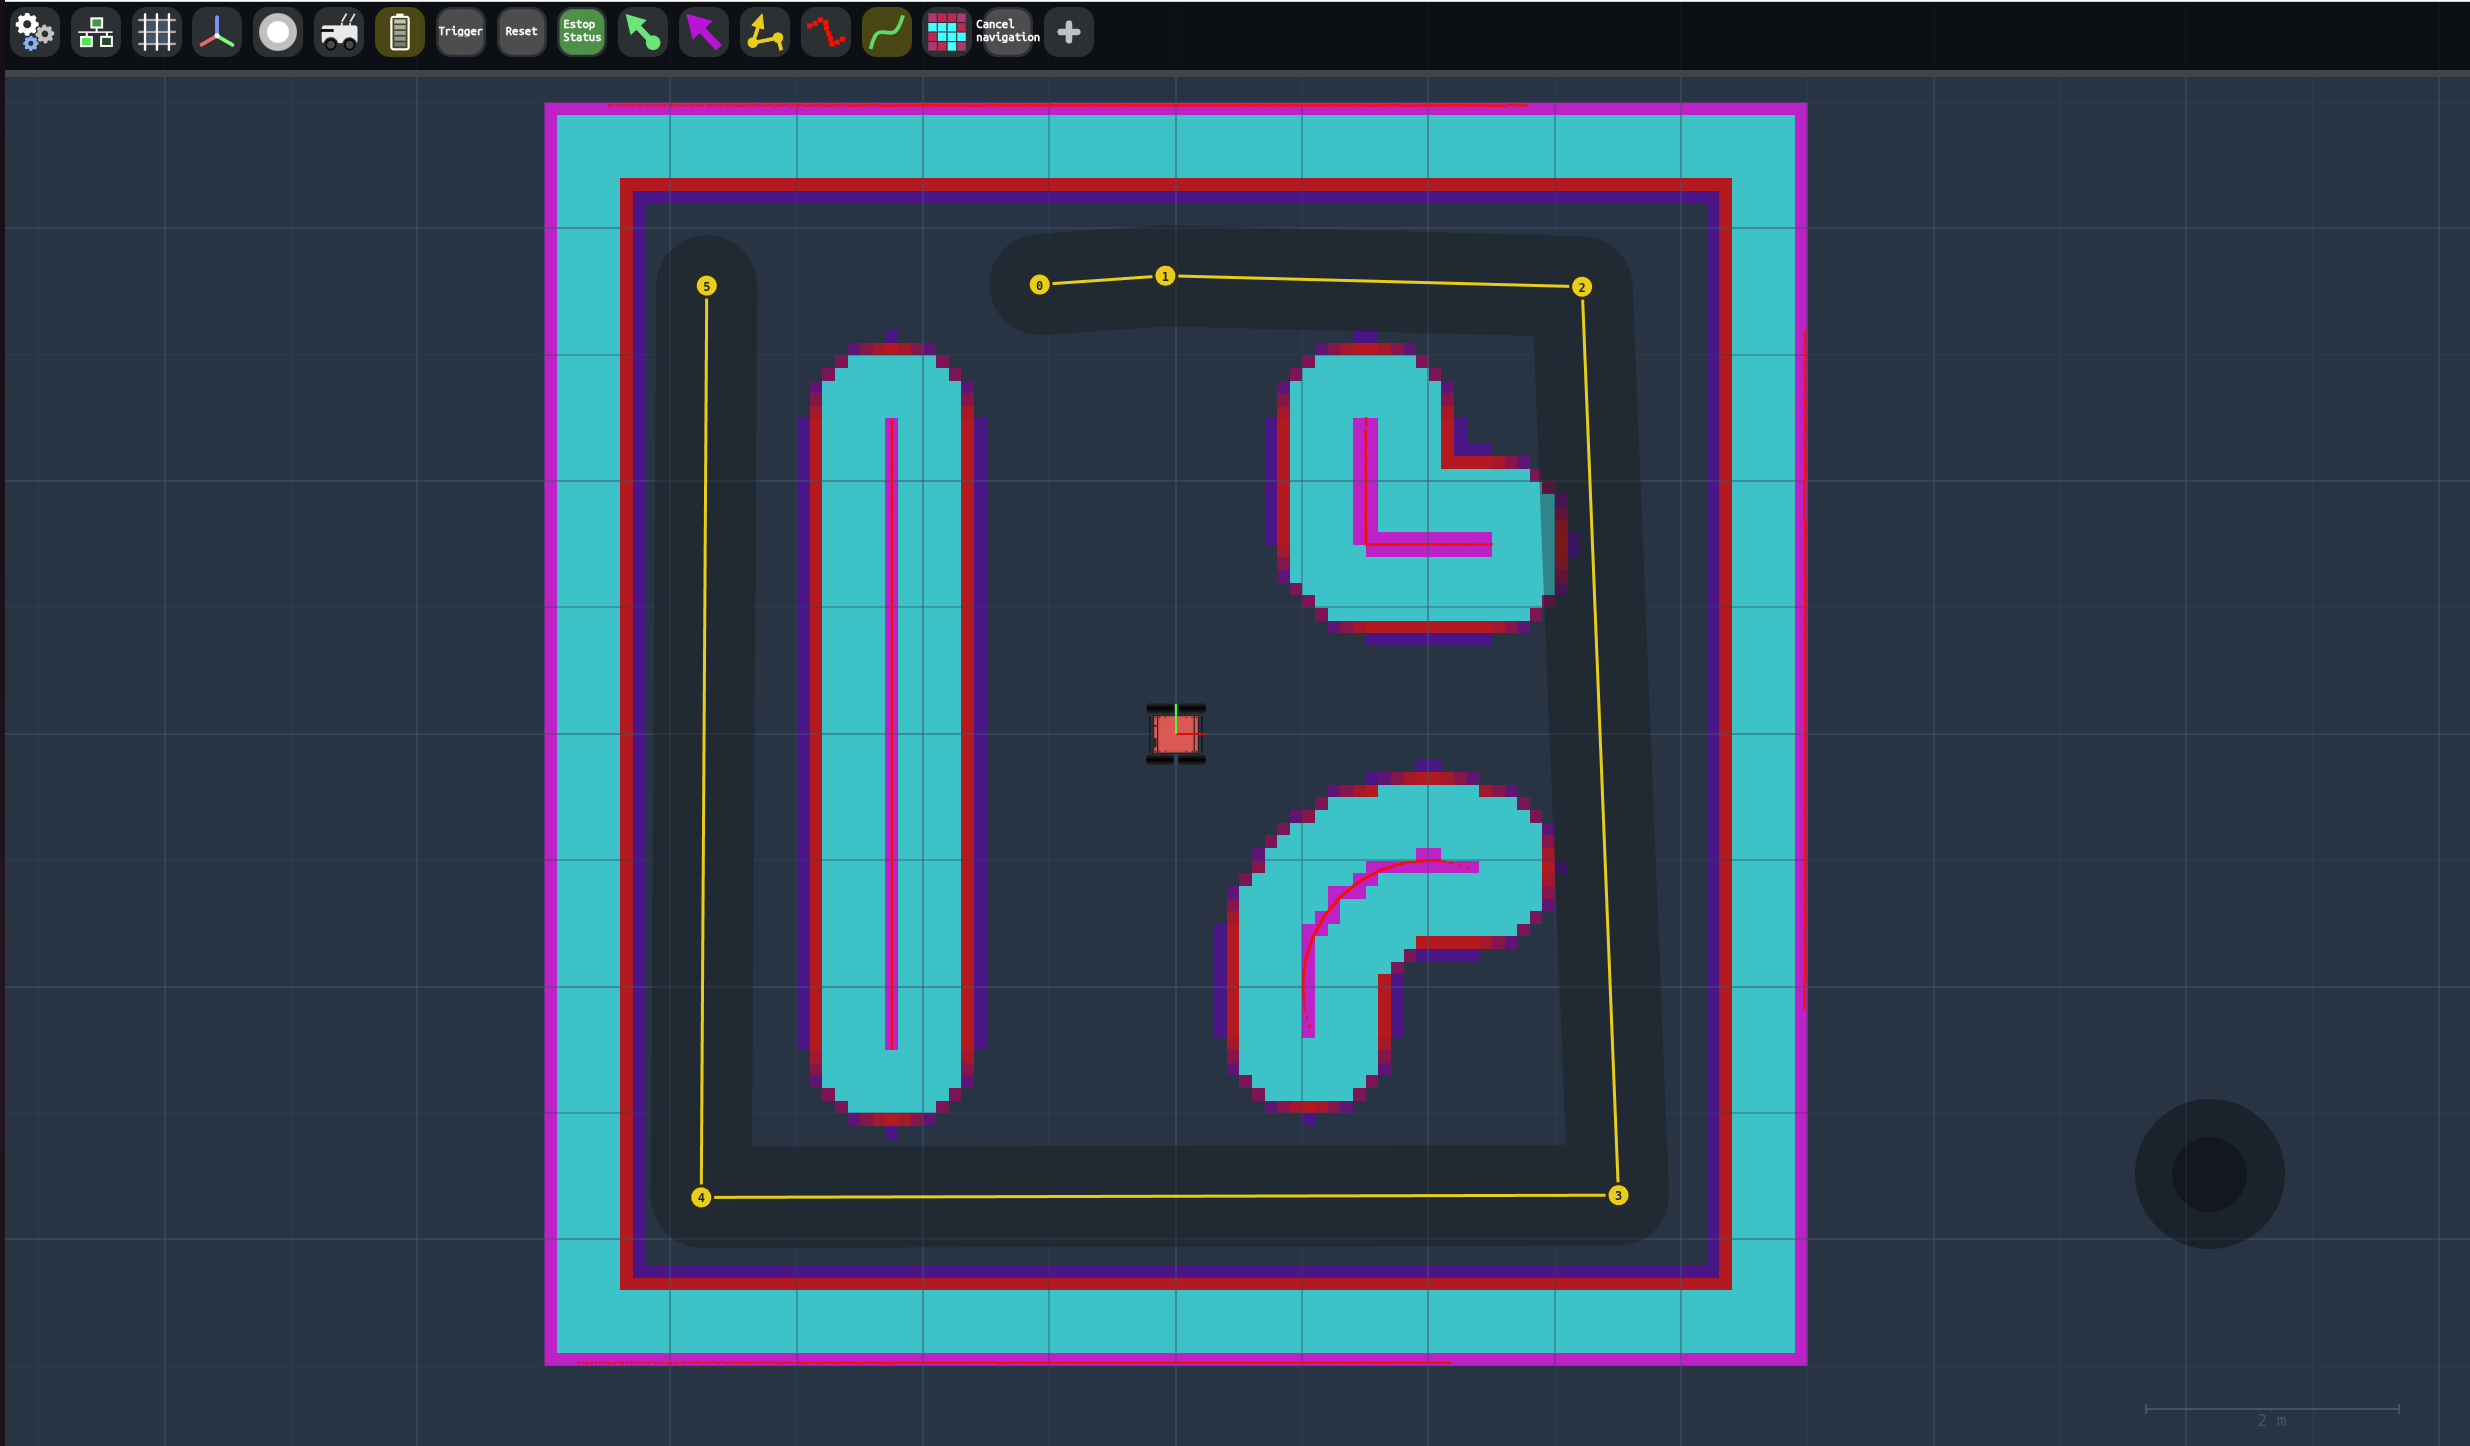
Both libraries use their own configuration files to define what kind of visualizations should be active. We implemented automatic creation of these configuration files, based on the configuration that is passed to the launch file. For example, when the platform configuration is a vehicle with a lidar where navigation is enabled, Rviz starts with the automatically created configuration showing the robot models, lidar scan, maps and planned path:
Register System
In ROS, a launch file can be used to launch multiple nodes at the same time. Unfortunately, the ROS launch system provides no mechanisms to ensure the order or moment of launch of the individual nodes. This can occur problems when nodes depend on other nodes.
To overcome this problem, we have created a register system, defined in rcdt_launch/register.py. With this system, we can ‘register’ each node in our launch files. With use of event handler mechanism of ROS, we can ensure that the nodes are started in the registered order. We can also define when a node should start, based on three methods:
method: |
The next node can be started: |
|---|---|
|
Directly after this node is started. |
|
When this node is finished (exited). |
|
When this node logs the defined log message. |
To still support the possibility to include launch files in other launch files, we also defined the RegisteredLaunchDescription class, which extends the default IncludeLaunchDescription class. This new class adds a mechanism to give a launch file a group id. This group id is used in the register system to ensure that the launch order of nodes is still respected, even with included launch files. Besides the four methods described above, a fourth method is available to use with registered launch descriptions: Register.group(registered_launch_description).
Overview
The following diagram gives a very simplified overview of the current state of our robot system:
        ---
  config:
    class:
        hideEmptyMembersBox: true
---

classDiagram

%% Franka:

namespace franka {
    class franka.moveit_manager:::moveit_manager

    class franka.moveit_servo:::external_node

    class franka.moveit_ros_move_group:::external_node

    class franka.controller:::vendor
}

franka.moveit_manager --> franka.moveit_ros_move_group
franka.moveit_servo --> franka.controller
franka.moveit_ros_move_group --> franka.controller

%% Panther:

namespace panther{
    class panther.nav2:::nav2

    class panther.controller:::vendor
}

panther.nav2 --> panther.controller


%% Sensors:

namespace realsense{
    class realsense.depth_image:::vendor
}

namespace zed{
    class zed.depth_image:::vendor
}

namespace velodyne{
    class velodyne.pointcloud:::vendor
}

namespace teltonika{
    class teltonika.gps:::vendor
}

velodyne.pointcloud --> panther.nav2
teltonika.gps --> panther.nav2

%% Joystick:

class joystick

joystick --> franka.moveit_servo
joystick --> panther.controller


classDef external_node stroke: #0000ff
classDef moveit_manager stroke: #ff0000
classDef nav2 stroke: #00ff00
classDef vendor stroke: #ff00ff
You can see two robots (franka and panther) and four sensors (realsense, zed, teltonika and velodyne). Note that the output of the teltonika (gps) and the output of the velodyne (pointcloud) are used in nav2 to navigate the panther. Output of the depth camera’s are not used at the moment. There are three ways to control the robot:
        classDiagram

class joystick{
    mapping parameters

    joy_topic_manager()
    joy_to_twist(franka)
    joy_to_twist(panther)
}

class moveit_manager:::moveit_manager{
    arm parameters

    move_to_configuration()
    move_hand_to_pose()
    add_object()
    clear_objects()
}

class nav2:::nav2{
    vehicle parameters

    navigate_to_pose()
    follow_waypoints()
}

classDef moveit_manager stroke: #ff0000
classDef nav2 stroke: #00ff00
joystick:
This joystick contains a joystick_topic_manager to switch the control between franka and panther. A joy_to_twist node converts the joy message to a twist message. For panther, this twist message can be directly send to the drive controller. For franka, moveit_servo is used to calculate the required joint command that results in the desired twist command of the end effector.
moveit_manager:
For robot arms, we created a moveit_manager node as a layer above the moveit_ros_move_group node. This manager provides functionality like moving to a default configuration or moving the end effector to a given pose.
nav2
For robot vehicles, we use nav2, a set of nodes that provide functionality like navigating to a pose or following waypoints.
At the moment, we can use the joystick, or functionality of the moveit_manager or nav2 to control the robots.
vendor elements
Note that the elements in purple are provided by the vendor of the robot or sensor. We expect some basic functionality, like a controller for a robot and the data output of sensor, provided by the vendor of the product. We only make small adjustments or support for simulation when required.
default ROS elements
Note that the elements in blue are default in ROS and not created by us.
namespaces
Note that each robot and sensor lives in it’s own namespace. This enables us to add as many robots and sensors to our system as we like, even when they are the same. For example: if we would have a second Franka arm, we can define the namespaces franka1 and franka2.
modularity
With this setup we focus on the modularity of the system. We can add sensors and robots if we like and reuse nodes that we already developed. If we add another robot arm, we expect the vendor to provide the correct controller nodes. We only need to define the related parameters and should be able to use it again with our Moveit Manager and the default Moveit nodes provided in ROS. And if we add another robot vehicle, we can still use our current Nav2 setup, only requiring the correct definition of the related parameters.
central controller
At the moment, a human is still the central controller in our system. A human can control both the robots using the joystick or via service/action calls to the Moveit Manager or Nav2. Our goal is to get the human out of the loop.